Saturday, May 11, 2013

Hula Hooping


I'll admit it, all my bravado about pushing through 'crafter's block' was for naught. I haven't done very much worth blogging! Instead, I've been trying to get outside and smell the roses, so to speak.
 
That being said, I thought it would be nice to share some of the things I see out there. I figured that it's part of my "World of Sevcraft" even if it isn't quite a craft. Something I like to do when I go outside is hula hoop. It's very liberating, almost meditative. When I am hooping I don't care about how foolish I look and all my problems seem to disappear.
 

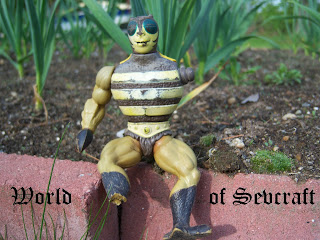
I don't do any tricks, I just walk around the yard. Maybe someday I'll venture out into the big scary world but for now I'm happy with the area I have. Yesterday I found this funny little guy sticking out of the ground!


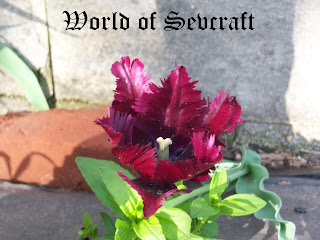
Here's some more of what I found...


Take a walk outside. Pay attention. There are some beautiful things all around us, even just in the backyard. Do something you enjoy, and take time to relax and de-stress. It's something we all hear, but not enough people follow through. Happy crafting, and happy hooping!

Wednesday, May 1, 2013

Round-Bottom Drawstring Pouch Tutorial

I'm sure that this isn't the first tutorial you've seen for this particular idea, nor will it be the last, or even the best. However, I'd still like to share something that has always been one of my favorite sewing projects. I used to make these little pouches often when I was a kid because they were perfect for marbles, pet rocks, coins, or whatever other trinkets and treasures I came across. Nowadays, they're still useful, not to mention a cute accessory that you can custom make to match an outfit for your night on the town. This craft is great for beginners and can be customized in countless ways.
Let's get started, shall we?

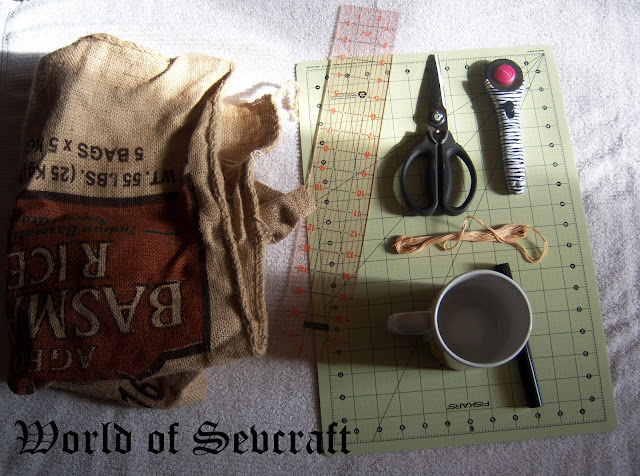
Materials
 
  • Fabric!
  • Rotary Cutter and/or scissors
  • Ruler
  • A nice flat surface
  • Something circular for the bottom piece
  • A marker
  • Thread
  • Needle and pins (not pictured)
  • Your desired drawstring (not pictured)
Step 1


After you've gathered your materials, the first thing you'll need to do is cut your fabric to the appropriate size. Trace your circular object, in my case a mug, onto your fabric and then cut it out to begin.

 This was my first time using burlap and I have to admit, I didn't quite know how to handle it. I've definitely worked with more pleasant fabrics before.


Here is where some math comes in. To get the length of the next piece you need the equation π*2r...or you can be lazy like me and use this website! The radius of the circle piece I cut out is about 2.25 inches, so the circumference is a little less than 16 inches. Make sure to give yourself a little bit of a seam allowance before you cut. The height of this piece is up to you, it depends on how big you want your bag to be.


Step 2
Now it's time to being sewing. The first thing you'll want to do is fold your rectangle piece in half, "hamburger style" with the good sides together, and pin. I used a whip stitch to sew this but you can really use any type of stitch you'd like. Be sure not to sew all the way up, as you'll need space for your drawstring casing. I used 3 strands of embroidery floss because I wanted a thicker thread for working with burlap.


When you're done, you'll be ready to sew the bottom on. You may want to pin as you go, like I did. By that. I mean to pin it in one place, sew that area, and then remove the pin and put it back in the next spot. Get it? I hope so!


Step 3
You're almost done! Now that the basic structure of the bag is done, the last thing you'll need to do is make the casing for your drawstring. To do this, simply fold the top of the bag over. Make sure that it is thick enough for whatever you're going to use for the drawstring. You should use a basic straight stitch here. The opening of your casing will be the place that you stopped sewing earlier.


Once your casing is done, all you have to do is thread your drawstring through it. I chose to use a piece of gold string that was used for packaging something, I don't remember what. You may want to attach a safety pin to one end; that makes it much easier to work it through.


There you have it. I'm not entirely happy with the bag I made; I did have some difficulty with the burlap. Hopefully yours came out better than mine! There are so many ways you can customize these pouches. Sew them inside out, use different colored threads, make tiny pouches or alter the pattern to make a large purse! These are great for children or adults, and I can think of a few uses a man might have for them.


It's all starting to come together!
 
Of course I couldn't let you go without seeing my progress on the cross stitch. I bet you know what it's going to be now!

Sunday, April 21, 2013

Stuck in a Rut!

Lately I've been having crafter's block. Similar to writer's block, this is a serious condition characterized by a lack of motivation, inspiration, and activity. I don't think my insurance covers this type of thing, so I'm just going to have to push through it. As a first step in battling my block, I made another travel case for cross stitching projects.


This one is going to go up on Etsy. I don't really think anyone will be interested in it, because it "looks handmade" but I think it's a solid design. It has a pocket, as the first one did, and I also included a small pincushion, which I think is ideal for when you're getting a new piece of floss for your needle. I also used ric rac for the edges, because as you may or may not remember, I hate bias tape.
 

It's the same size as the previous one I made; for 6 inch hoops and under.


And what's that peeking out from under the fabric? Why, it's the cross stitch I'm working on, of course.


Have I mentioned how this one seems to be taking longer than usual? It doesn't seem like I've gotten much more done in the last week. Maybe I can blame the aforementioned crafter's block, eh?


Saturday, April 13, 2013

Cross Stitch Update 2.2

It's been a while but here I am. Busy busy busy!
Here's what I've been working on:


Do you know what it is yet? I won't say a word!

Yesterday was April 12, and guess what... we got snow! This is pretty silly, mother nature.
I don't think this is what they mean by "April Showers"
 

Wednesday, April 3, 2013

Out With The Old...

...In the with new! In this case, pincushions!

 
 I made this lovely cactus a few years ago, but it's starting to get a little beat up. FACT: I am very clumsy. I've dropped the poor thing so many times, the bottom of the plastic pot it's in is cracked, and the rocks I used to weigh it down have been falling out.


Having replanted my Valentine's Day rose plant a few weeks ago, I decided the pot it can in would be perfect for a new pincushion. It's very cute and has sentimental value, so it needed a special use.
 
I had a hard time deciding which fabric to use. I wanted that to be special too, and not just something that happened to coordinate with the color scheme or anything (I don't really know how to match colors anyway). I chose my favorite fabric, one that I usually fall back on when I can't make up my mind. Strawberries are always cute. Someday I want to have about 50 different matryoshka fabrics as well.


 Hopefully I won't drop this one. Something I like about it is that if the cushion gets beat up it'll be easy to replace it. I don't know what I'm going to do with my faithful cactus, but I'm certainly not throwing it out.


Sunday, March 31, 2013

Cross Stitch Update 2.1

Happy Easter everyone. I hope you're all spending the day with your families and maybe watching Ben Hur. As for me, I've been working on my latest cross stitch. It still doesn't look like much though!

Can you guess what it will be?
I also found an old stencil I made but never used. It's Kid N Play! Inspired by their 2Hype album, I decided to put it on a blank Tshirt.
 
 
Making a stencil is pretty simple. What I do is draw an image on a piece of paper, which I then tape to some cardboard, usually the kind that cereal boxes are made of. Then I use a cutter to cut out the image. It would be a lot easier and look better if I used a craft knife, but I don't own one. Once I'm done cutting it out, I am left with two pieces that could potentially be used as stencils, depending on what style of image I want.
 
For this project I used Polymark fabric paint, which is a dimensional paint. However, I didn't want it to be dimensional so I used a paintbrush to smooth the paint. Easy peasy, and you're left with a "new" shirt to show off!


Wednesday, March 20, 2013

Vernal Equinox

Today is the first day of spring! My favorite season, so full of life. The smell of dirt and the new growth surrounding you. I look outside, hoping by some magic that the snow storm yesterday was just a dream, and I see this.


Not just yet. I'll have to wait a while longer. At this rate, we might skip spring altogether and jump right into summer! This time last year, it was already in the mid-70's. Ah, well.

I started my newest cross stitch project. Someone wants a James Bond stitch, so I am using the iconic image of the gun barrel, with a silhouette in the middle. It's a simple image, but this time I am using 10 different colors instead of the 5 I usually do. I'm also doubling up on floss, meaning I am using two strands instead of 1. I want to eliminate the small amount of white in between all my X's.
That black bar looks pretty solid.
This one is also a bit bigger than usual. I have the feeling I am going to have to make a trip to the store to stock up on some more floss, lest I run out.
I also have a vacation from work coming up soon, so hopefully I will get on the crafty train. Sometimes it's tough to motivate myself after a long day at work. There'll be no excuses on my vacation however!

Saturday, March 16, 2013

A Finished Stitch


I've finally done it. After 46 days of hard work, my Jack Nicholson cross stitch is complete! The first thing I do when I finish a stitching project is iron it.


Next is the framing. This is personally my least favorite part, but with the help of this awesome tutorial it's much easier!


What do you think?
Now it's ready for my Etsy shop. I have no idea what to charge for it though!
 
Time to look forward to my next project!


Saturday, March 9, 2013

Dr. Severin, Teddy Bear Surgeon

I am in the habit of rescuing doomed stuffed animals when I can. I hate the thought of them sitting in a dump, or neglected on the side of the road.

Meet "Yellow." I found him sitting next to someone's trash barrel, so I scooped him up, took him home, washed him and gave him the love he needed. There was, however, one small detail, for which he may have been thrown out. That was his left eye; it had a tendency to fall out, or get lost inside his head.
This little sweety needed some 'surgery' to fix him up.

I came up with a quick fix for this problem. I took a small scrap of fabric and cut a small slit in the middle of it. Then I sewed around the edge of the slit, without tying off. The color of the fabric and thread doesn't matter, as it is going to end up inside of the bear's head.


Next I put the eye inside of the whole in the fabric, carefully aligning the fabric with the gap between the black and white parts of the eye (seen above). I pulled the string tight, making sure it was in that gap. Now I tied the string.

If I had some extra eyes, I think I would make flowers using this method!

The trickiest part to me was putting the eye back into the socket just right and sewing it up. Find a matching color thread for this part, and make sure that the fabric you sewed the eye to is in a good place to be sewn to his face.


It's not perfect, but at least I don't have to worry about losing an eye! I think he even looks a bit happier now. For a cute, patchy look, you could sew the fabric to the outside of his head.


Sunday, March 3, 2013

Cross Stitch Progress 1.4

Here is a quick little update, hopefully I will have some real content coming soon.


Very close to completion!


Here's the beautiful view I get to see on my drive home from work.

Sunday, February 24, 2013

Cross Stitch Update 1.3


Tonight I decided to try to make a little order out of the chaos of my embroidery floss. Here's what I started with.
I focused on organizing the bobbin case 2 black plastic containers I have. I received all the bobbins from my aunt recently. Each one is clearly labeled and they were all painstakingly put into numerological order. I can imagine my aunt hunched over her work for hours organizing them, making labels, winding the floss onto the bobbin, and finding the perfect spot, constantly rearranging them if they weren't perfect. Less realistically I imagine her doing all this by dim candlelight. In spite of all this, like a naughty little child I DUMPED the whole thing!


Why, you ask? Because I wanted it to be ordered by pretty color instead of number. It started out fine, but less than half-way through I wished I hadn't done it. I know there's got to be a reason these things are numbered the way they are, and it has to work, but I just don't like it. Of course it's far from perfect the way I did it, too. I had a hard time deciding where some colors would go.
I also separated all the black, white, and gray colors since those are the ones I use the most. Here's what I ended up with!
It really doesn't look like I did much, especially for all the time it took me. Over all I don't regret it though. Next time I'll work on the bags, but I think I'm going to need at least another floss organizer to get it the way I want it. How do you keep your embroidery floss organized?

I'm half-way done with the Jack Nicholson stitch!