I'm sure that this isn't the first tutorial you've seen for this particular idea, nor will it be the last, or even the best. However, I'd still like to share something that has always been one of my favorite sewing projects. I used to make these little pouches often when I was a kid because they were perfect for marbles, pet rocks, coins, or whatever other trinkets and treasures I came across. Nowadays, they're still useful, not to mention a cute accessory that you can custom make to match an outfit for your night on the town. This craft is great for beginners and can be customized in countless ways.
Let's get started, shall we?
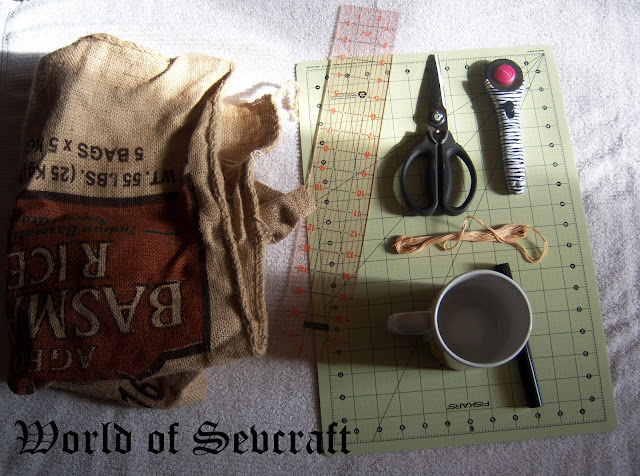
Materials
Fabric!
Rotary Cutter and/or scissors
Ruler
A nice flat surface
Something circular for the bottom piece
A marker
Thread
Needle and pins (not pictured)
Your desired drawstring (not pictured)
Step 1

After you've gathered your materials, the first thing you'll need to do is cut your fabric to the appropriate size. Trace your circular object, in my case a mug, onto your fabric and then cut it out to begin.
This was my first time using burlap and I have to admit, I didn't quite know how to handle it. I've definitely worked with more pleasant fabrics before.
Here is where some math comes in. To get the length of the next piece you need the equation π*2r...or you can be lazy like me and use
this website! The radius of the circle piece I cut out is about 2.25 inches, so the circumference is a little less than 16 inches. Make sure to give yourself a little bit of a seam allowance before you cut. The height of this piece is up to you, it depends on how big you want your bag to be.
Step 2

Now it's time to being sewing. The first thing you'll want to do is fold your rectangle piece in half, "hamburger style" with the good sides together, and pin. I used a whip stitch to sew this but you can really use any type of stitch you'd like. Be sure not to sew all the way up, as you'll need space for your drawstring casing. I used 3 strands of embroidery floss because I wanted a thicker thread for working with burlap.

When you're done, you'll be ready to sew the bottom on. You may want to pin as you go, like I did. By that. I mean to pin it in one place, sew that area, and then remove the pin and put it back in the next spot. Get it? I hope so!
 Step 3
You're almost done! Now that the basic structure of the bag is done, the last thing you'll need to do is make the casing for your drawstring. To do this, simply fold the top of the bag over. Make sure that it is thick enough for whatever you're going to use for the drawstring. You should use a basic straight stitch here. The opening of your casing will be the place that you stopped sewing earlier.

Once your casing is done, all you have to do is thread your drawstring through it. I chose to use a piece of gold string that was used for packaging something, I don't remember what. You may want to attach a safety pin to one end; that makes it much easier to work it through.
There you have it. I'm not entirely happy with the bag I made; I did have some difficulty with the burlap. Hopefully yours came out better than mine! There are so many ways you can customize these pouches. Sew them inside out, use different colored threads, make tiny pouches or alter the pattern to make a large purse! These are great for children or adults, and I can think of a few uses a man might have for them.
It's all starting to come together!
Of course I couldn't let you go without seeing my progress on the cross stitch. I bet you know what it's going to be now!


